Hey there, if you’re running an injection molding floor, you know that an injection molding robot arm isn’t just a shiny add-on—it’s your workhorse for those 24/7 production runs, picking parts fast and keeping your line moving. But let’s be real: these bad boys are strong, precise, and if you skip the safety stuff, they can turn a routine job into a headache (or worse, a serious injury). I’ve been on this side of the industry for years—we sell these robots, but we’ve also spent way too much time fixing the aftermath of someone cutting corners on safety. Today, I’m breaking down the real, no-BS stuff to keep your team and your robot humming, no fancy jargon required. Injection Molding Robot Arm
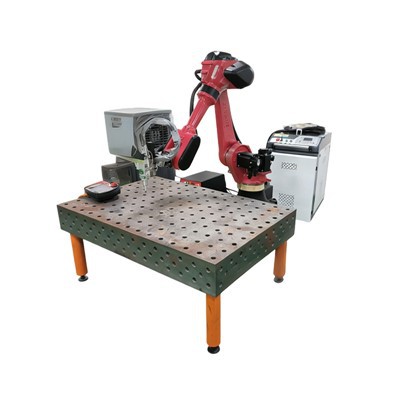
First off, let’s get one thing straight: safety isn’t just a checklist to tick before a shift. It’s the first rule of operating any industrial robot, period. Last year, we worked with a midsize auto parts shop that skipped training a new temp on their robot’s guard boundaries. The temp leaned in to grab a fallen tool during a cycle, and the arm shifted unexpectedly—no serious harm, but they spent three days out of production, and the robot’s end-of-arm tool got crunched. That’s thousands in lost output and repair, all because someone thought “I’ll just do this quick real fast.” So let’s start with the absolute basics: never work inside the robot’s “safety zone” when it’s powered on. Most modern robots have light curtains or pressure-sensitive mats around their work envelope—don’t tape those off. Those aren’t suggestions; they’re fail-safes that stop the arm before it can cause damage. If your floor’s tight and you think you need to step inside, make sure you’ve hit the E-stop (that big red button everyone ignores until it matters) and locked it out with a padlock—tag it too, so no one else turns the power on while you’re in there.
Next up, training. I don’t care if your operator is a 20-year vet or a new hire who just walked in the door that morning—you can’t skip proper training. A lot of shops make the mistake of “shadowing a guy for an hour” and calling it good, but injection molding robots have specific quirks: they sync with the molding machine’s clamp cycle, they can throw sharp plastic flash if a part gets stuck, and their payload limits aren’t just a number in a manual. Our team doesn’t just ship a robot and leave—we do on-site training for every single operator, going over stuff like how to set the cycle speed correctly for your parts (too fast and the arm can misalign, too slow and you’re wasting time) and how to troubleshoot a jam without putting hands near the mold. We even do hands-on drills: simulate a part stuck in the mold, practice hitting E-stop correctly, test the light curtain sensitivity. And we don’t stop there—refresher training every six months is non-negotiable. People get complacent. A few months back, we had a customer whose operator had been running the same robot for three years, and he forgot to adjust the arm’s height after switching to a smaller mold. The arm slammed into the mold’s core, cracked it, and shut down production for two weeks. That’s avoidable with a little refresh.
Now, daily pre-shift checks. This isn’t just “wipe the robot down”—it’s quick visual stuff that takes five minutes and saves you a ton of trouble. Let’s break it down: first, inspect the end-of-arm tool (that’s the gripper or whatever’s picking up parts). Look for cracked fingers, loose bolts, or bent suction cups if you’re using vacuum grippers. A bent finger can slip and drop a hot part, which isn’t just a burn hazard—it’s also a slip-and-fall on the floor. Next, check the safety devices: test the light curtain by stepping through it (don’t do this with the robot fully running—put it in manual mode first), make sure the pressure mats around the base aren’t torn or covered in scrap plastic. Then, check the power and air lines—look for frayed cables or loose air hoses. A frayed cable can short out mid-cycle, sending the arm careening, and a loose hose can cause the gripper to drop a heavy part onto someone’s foot. Last, do a test run in manual mode: move the arm slowly through its full cycle, check if it aligns with the molding machine’s part drop-off point. If it’s off, fix it before you start production. We always tell our customers: if something feels “off” during that test run, stop. Don’t push through it to make quota—quota’s not worth a broken robot or an injury.
Speaking of manual mode—don’t let anyone run the robot in auto mode until it’s fully test-run in manual. I’ve seen shops cut corners here, too. They set the cycle, hit auto, and walk away to grab a coffee or check another machine, and that’s when a stuck part or misalignment causes a crash. Auto mode is for when the cycle is perfect, every time. Manual mode is your safety net for setup, troubleshooting, and testing. We always remind customers to keep the manual mode toggle on the teach pendant (that little controller the operator uses) within arm’s reach at all times—don’t leave it on the table across the floor. And never leave the teach pendant unattended. A coworker walking by might hit a button by mistake, sending the arm moving toward someone else.
Now, payload and cycle limits. I know it’s tempting to push your robot to pick up a part that’s a little over its max payload, or run the cycle a little faster to crank out more parts. But that’s how you break things. Payload isn’t just the weight of the part—it’s the weight of the gripper, any additional tools, and the speed at which you’re moving it. If your robot is rated for 10 kg, don’t try to lift a 12 kg part just because it fits the gripper. The stress that puts on the joints and motors will shorten the robot’s life, and if the arm can’t handle the load, the gripper might drop the part mid-cycle, leading to burns or broken equipment. Same with cycle speed—faster isn’t always better. We have a customer who ran their robot 20% over its rated speed to make extra parts, and six months later, the arm’s wrist joint seized up. Repair cost them $8k, plus two weeks of downtime. That’s way more than the extra parts they made. Stick to the specs we give you—they’re there for a reason.
Another big one: scrap and part disposal. Hot plastic parts coming out of the mold are anywhere from 150 to 300 degrees Fahrenheit, and if the robot drops one or the operator has to reach in to remove a misaligned part, that’s a serious burn hazard. We recommend using part chutes that carry parts away from the robot’s work zone, so no one has to reach in when the robot is running. And if a part does get stuck in the mold, don’t reach in to pull it out while the mold is still closed. Wait until the mold opens, hit E-stop, and lock it out before you attempt to remove it. A lot of new operators will panic when they see a stuck part and reach in without thinking—don’t let that happen. Post signs near the robot that say “NO REACH INSIDE WORK ZONE WITHOUT E-STOP & LOCKOUT” to remind everyone.
Maintenance is also part of safety, and it’s not just a one-time thing. You can’t wait until the robot breaks to service it. Follow the maintenance schedule we give you (or your robot’s manual—we make these super clear). That means lubricating the joints every 3 months, checking the gear oils, tightening loose bolts, and updating the robot’s software regularly. Outdated software can cause the robot to act unpredictably—like suddenly changing the cycle path or ignoring a light curtain trigger. Last year, a customer of ours had an old robot that hadn’t had a software update in two years. The arm’s path shifted because of a minor calibration glitch, and it hit the molding machine’s nozzle, causing a plastic leak that set fire to a small pile of scrap. No one got hurt, but the machine was down for a week. Regular maintenance prevents that stuff.
Now, what about when something goes wrong? No matter how careful you are, sometimes a jam or glitch happens. The first thing anyone should do is hit the E-stop—don’t try to fix the problem while the robot is still running. We always say E-stop is your best friend. Once the E-stop is hit, lock it out so no one can turn the power back on while you’re troubleshooting. Next, never try to move the arm manually until the power is off and locked out. Some operators think “I’ll just push it out of the way” while the power is on, and that’s a quick way to get your hand crushed. Most modern robots have a manual release mechanism, but you should only use it when the power is fully disconnected. And always report the issue to your supervisor or our service team—don’t try to hide it. Hiding a small jam can lead to a bigger problem later, which is more expensive to fix and more dangerous.
Let’s also talk about the little stuff that adds up: personal protective equipment (PPE). This isn’t optional. Operators should wear closed-toe shoes to protect their feet from dropped parts, safety glasses to keep hot plastic or metal shavings out of their eyes, and heat-resistant gloves if they’re handling hot parts or troubleshooting. We see shops that let operators wear sandals or no glasses, and that’s just asking for an accident. PPE is a small investment that keeps your team safe.
Wait, one more thing: space. Make sure your robot has enough room around it. Don’t cram it into a tight corner where there’s barely space to move the arm. If the work zone is too small, the arm might hit nearby equipment or a coworker walking by. We always measure the floor space for our customers before installing a robot—we know the exact footprint and work envelope, so we can help you plan your floor layout to avoid congestion. If someone has to walk through the robot’s work zone, add a physical barrier like a fence with a gate that has its own safety switch—if the gate opens, the robot stops automatically. That’s a great middle ground for shops that need to move around the line without removing safety.
Now, a quick note from our side as injection molding robot arm suppliers: we build these robots to be safe, but safety starts with you. We don’t just sell equipment—we’re here to support you with training, maintenance, and troubleshooting whenever you need it. If you’re setting up a new robot, or you’re looking to upgrade your current line, we can walk you through every safety step to make sure your team is covered.
Before I wrap this up, let’s recap the key points so you don’t forget them: hit E-stop and lockout before entering the work zone, train every operator properly (and refresh regularly), do 5-minute pre-shift checks, run in manual before auto mode, don’t exceed payload or cycle speed, keep scrap and hot parts away from the work zone, follow maintenance schedules, use E-stop first when something goes wrong, wear PPE, and give your robot enough space. These aren’t just rules—they’re the things that keep your team safe, your production running, and your costs low.
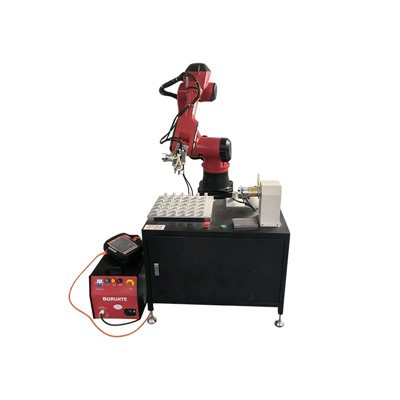
If you’re in the market for a new injection molding robot arm, or you need help optimizing your current setup to be safer, don’t hesitate to reach out to our team. We’ll be happy to answer any questions you have, walk you through our safety protocols, and help you find the right solution for your shop. Don’t wait until an accident happens—safety is a daily job, and we’re here to help you do it right.
References
Nail Gun Robot OSHA 29 CFR 1910.217, Machine Guarding; RIA R15.06-2012, Industrial Robots and Robot Systems – Safety Requirements; Society of Manufacturing Engineers (SME) Guide to Industrial Robot Safety for Injection Molding Operations
Dongguan Chuanglida Intelligent Equipments Co., Ltd.
As one of the most professional injection molding robot arm manufacturers and suppliers in China, we also support customized service. Please feel free to buy discount injection molding robot arm in stock here from our factory. For price consultation, contact us.
Address: Room 201, Building 2, No. 61, Shachang 1st Road, Dalang Town, Dongguan City, Guangdong Province
E-mail: haoguangli001@outlook.com
WebSite: https://www.boruntestech.com/
